Easy Centerpiece for your Thanksgiving Table

easy+thanksgiving+centerpiece

With Thanksgiving in just a couple days I thought I would share an easy, DIY centerpiece to dress up your table.  This centerpiece can be done with little cost. With the exception of the flowers that cost me $20, I used what I had at the house or could find outside. 

Here is what I used:

  • decorative runner I had purchased last year from World Market
  • flowers
  • pine cones
  • small pumpkins- left over from Halloween
  • variety of tree branches from local park- Magnolia, Oak (i believe) and Holly
  • a few naval oranges
  • two green vases I purchased a few years back from Target
  • a couple decorative brass bowls and candlesticks


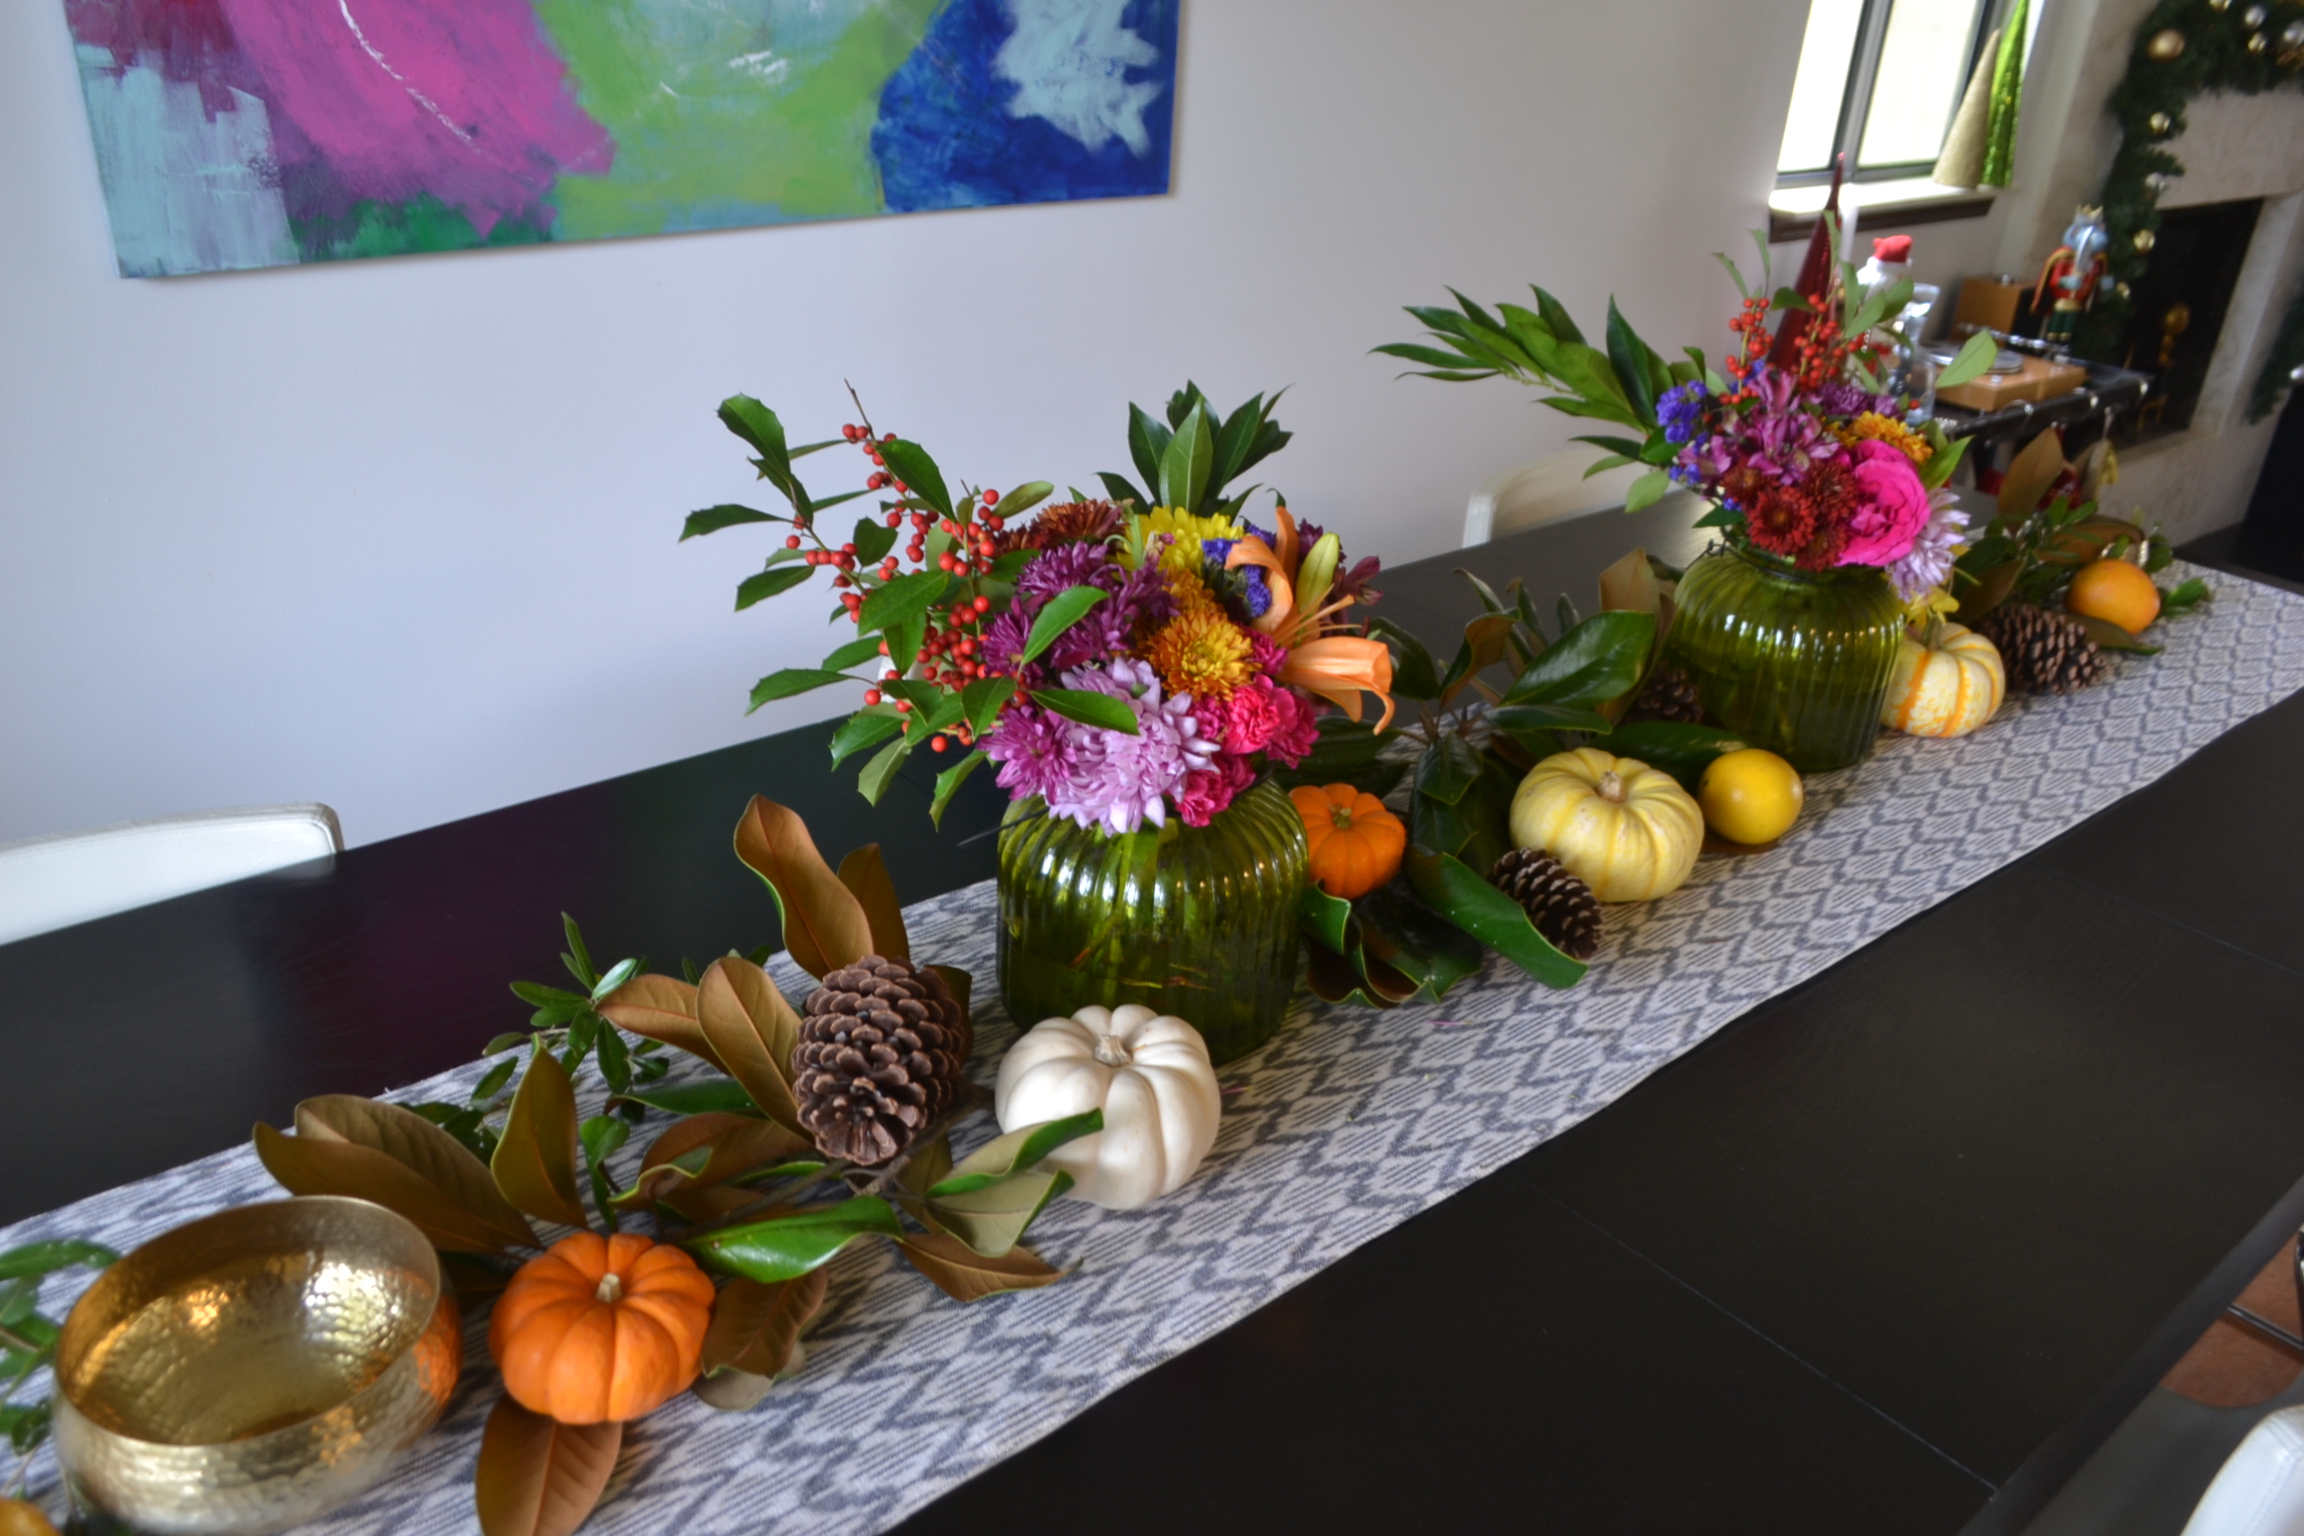
First decide on the color palette you want. I wanted to add a bit more color than what you would normally associate Thanksgiving with. I found a couple bouquets at the grocery store that had a combination of orange, yellows, pinks and purples. Next, decide how many arrangements you want. Since my table is pretty long I decided to do two.  Place the runner down and position your vases. I then started laying the branches, starting from left to right. I flipped some of the Magnolia branches face down so more of the brown underside would show. Once my "garland" was complete, I moved on to the vases.


Thanksgiving arrangement.jpg

I divided up the flower bouquets to make two similar arrangements. Working in a circular pattern, I started with the taller leafy pieces in the back and the brighter pink flowers upfront. Once I was happy with the arrangements, I added my filler (pumpkins, oranges, pinecones, and brass accents) to my garland.

There you have it! Easy-peasy and with little cost.

I encourage you to take inventory of what you already have at home.  For filler alternatives, you can use a variety of produce- apples, grapes, lemons, artichokes, pretty purple cabbage. Anything really that has some contrast to your clippings.

Easy THanksgiving centerpiece

Here I added candlesticks but I think I prefer it without them.

Thanksgiving centerpiece 3A
Thanksgiving centerpiece
Thankgiving centerpiece

Hope you all have a wonderful Thanksgiving!

Creating a Custom Look Without the Custom Price

Let’s face it—custom work doesn’t come cheap.  Whether it’s custom drapes, custom upholstery or custom art, they will more than come with a high price tag.  But there are ways to save and still achieve a custom look in your home.  Below are a few ideas on achieving a designer look without the custom price.

1. Custom drapery

-Don't use the pocket. First and foremost, do not hang drapery with a rod pocket if at all possible.  Instead, use drapery rings or hooks for a more finished look.   

Curtain pocket vs. curtain rings

Some retailers sell panels with hooks included.  If that’s the case, use them and attach to the rod with an inexpensive set of rings, removing the clasp for a closer hanging.

-Add trim.  Purchase inexpensive, plain panels from Ikea or a discount retailer and dress them up with custom tape trim.  If you’re not an avid sewer, you can use Stitch Witchery and iron it on.

-Hang them high.  We’ve mentioned this several times on here, but it’s worth repeating.  Purchase curtains all long as you can to fit in your ceiling height and hang the curtain rod as high as possible while still allowing the panels to skim the floor like in the image above.  It will make your room and your panels look even grander. Here's a great before/after illustration showing the difference.

2. Custom furniture.

Custom furniture is a costly venture and can often take a lot of time to receive.  Instead, opt for a piece that you can pick up in store at a furniture retailer or discount décor store (HomeGoods!) and then get a local shop to reupholster the back in a different (perhaps more expensive) fabric for a unique look. You can even add embellishments like nailhead trim.  You're left with a custom-look for a fraction of the price!

custom fabric back chair


3.  Custom art.

Instead of the store-bought, mass produced art options, support small business and shop from Etsy or a local artist. To frame the piece, purchase an inexpensive frame from HomeGoods or a craft store and get a custom mat cut to fit the frame.  Opt for a wider mat or off-centered cut for a more custom look.

Try these three tips to update your home with a designer look!

DIY Floating Shelves

diy floating shelves

After writing my post on mudrooms and sharing my frustration with the lack of organizational space we have, Mr. Nguyen told me to pick a weekend and we would knock out the hall project that I have been wanting to complete for over a year. Not only was I surprised that hubby reads my blog posts, I was thrilled to finally get the project done!

Meet our subject. This is the hall leading to our garage. When we moved in, it had been a narrow linen closet with even narrower floor to ceiling shelving and ugly bi-fold doors. The shelves were too narrow to fit much of anything on, so about a year ago we had the shelving removed and the walls patched up. It remained that way until this past weekend.

hall before

Since the alcove is too narrow for a bench, the plan was to build a couple floating shelves to act as a an area to display some art and also house keys and such.

After, it was decided to make the shelves approximately 10" deep x  3" high, the following items were purchased:  

 (2) 1x3x8 -one for each shelf                                                                                                                                                                        (1) cabinet grade sheet of 1/4" 4x8- for the top, bottom and front piece for both shelves                                                                 (1) pack of 1/4 toggle bolts
(1) can of Rustoleum stain in "Wheat"                                                                                                                                                        (1) Minwax stainable wood filler (Go with the larger size. I bought the smaller container and ended up needing more.)

rustoleum wheat wood stain
minwax stainable wood filler

To make it easier to transport, we had Lowe's cut down the 4x8 sheet into 4 top and bottom panels and 2 fronts which made the installation go quicker. The first step was to create a skeleton for each shelf using the 1x3x8. *Keep in mind when cutting the outward extending pieces to deduct both the depth of the back brace and front panel from your overall length so that you achieve the correct fished shelf depth. Also note, a 1x3 is not really 3" but actually 2.5". 

DSC_0992.JPG

The skeleton was then bolted to the wall and then the front, bottom, and top panels were nailed on.

I did not bother conditioning the wood before applying the stain. Once, the stain had dried it was a bit too yellow for me. The store had already closed and since I was on a roll, I decided to give Dana's coffee stain technique a try. One thing to note, use caution when brushing the coffee near the walls. Since it is very thin, it got underneath the painter's tape in some areas which I had to then go back and paint over.

It may be hard to tell from the pic, but after three quick coats of coffee the shelves had achieved a warmer tone that I liked. I definitely recommend using coffee as a stain. Not only is it cheap but smells good, as opposed to the toxic fumes that traditional stains have.

Well, there you have it. Now comes the fun part of decorating. If money were no issue I would purchase one of Jai Vasicek Malachi paintings and it would look something like this.

And on the adjoining wall a row of matte black hooks like this one.

matte black wall hooks

 Vasicek has a waiting list for his paintings, if that gives you any indication of the likely hood I would be able to procure one. So, I am thinking about painting an interpretation of his Malachi series. Eek! I will keep you posted if I get the nerve to do it.

Have a good one!


Felt Ornaments, Holiday Decor Steals and A Nursery DIY

It's the most wonderful time of the year!...well close, anyway.  I usually wait until after Thanksgiving to start decorating the house for Christmas, but this year I already have the itch.  Maybe it's because I have more time this year (last year we had a brand new baby that took all of our attention and I was lucky to have any decorations up).   Or possibly it's because we won't be spending Thanksgiving at our home, so I'm all "Out the pumpkins, in with the pine!"  Having a little one to enjoy all of the lights and sparkle is a incentive too...although it might make decorating a challenge with her little hands wanting to touch/pull on everything.  Whatever the case may be, I'm ready for holly!

I was looking at Crate & Barrel's holiday outlet sale online the other day and found some really cute ornaments for really cheap... and y'all know I love a good deal!  Specifically they had a good bit of felt ornaments (great for kids!) on sale.  Felt ornaments are great for many reasons:

  • Family tree decor- With these you don't need a bare bottom tree in worry that the kids will break something
  • Mini trees in your kids' rooms- Again with them not being fragile, the kids can even play with them and even decorate the tree themselves 
  • Gift wrapping- Finish off that cute wrapping job with a keepsake.  Some of these are cheaper than the cost of a bow!
  • Nursery decor- Before you call me crazy, let me explain.  How many of you have seen really cute felt/wool mobiles on Etsy that you loved but didn't like their price tag?  Well with a simple embroidery hoop or dowels, string/twine and ornaments, you can make your own!

Here are a few felt ornament favorites as well as some other great steals I had to share!

Felt Pigs- .57 (orig. 3.95) // Loopy Owls-$1.97 (orig. 8.95) // Polar Bears-$2.47 (orig. 9.95) // Felt Garland-$2.47 (orig. 9.95) // Mercury Glass Polar Bears- .97 (orig. 4.95) // Set of 12 Red and Green Heirloom Ornaments-$9.95 (orig. 39.95) // Carved Wood Horse and Donkey- .57 each (orig. 3.95) // Set of 3 Neighborhood House Ornaments-$2.57 (orig. 9.95) // Linen Scallop Stocking-$4.97 (orig. 19.95)

If you weren't already in the mood for Christmas decor, I hope these adorable deals have you there now!  

signature Mallory.png


DIY Balloon Fringe Tassels

I am currently immersed in first birthday party planning for my little girl.  Last minute crafting, getting bedrooms ready for out of town guests, wrapping up all of the finishing touches.  I feel like the first birthday is such a milestone, and I want to make it a memorable one.  I know she won't really remember it now, but I hope one day she can look back on the pictures and see all of the hard work that went into celebrating her first year of life.   

We're having a very intimate gathering at our home with some of our closest family and friends.  While it is a small affair, I absolutely love planning parties and all of the personal touches that go into them.  So naturally, I've exhausted my frugal, perfectionist, DIY self into making almost everything myself (with the exception of the cakes--although I am adding my own decoration to them).  Pinterest, of course, has been a great inspiration.  What did we do before that little site came along?

One of the ideas I got from Pinterest was making fringe tassels for the oversized balloons I purchased.  I love those guys.  Anyway, I wanted to create some tassels to go on them for Auden's first birthday pictures and her party.  Luckily, I found this tutorial by Firefly Events that described how to do just that.  

Image via Sweet Thing Blog

I followed her steps using some shirts I found at a local thrift store and some lace ribbon I had from a previous project.  The total cost (minus the balloons) was $4 ($2 per shirt).  You could obviously go to a fabric store to select your choice of fabric as well, but the closest one to me is across town.   And I'm sure I would have spent more there anyway (plus the cost of gas to get there).  So the thrift store it was.  Win, win.  Whatever fabric you end up using remember to take its weight into consideration.  Something too heavy will weigh the balloon down.  Which is also why using tissue paper is a good option.  If you're using more than one balloon, you can obviously have more weight.

Here is my finished product from afar.  It's all I have to show for now, but I'll be back with more photos and party details later.  I absolutely love how it turned out and am sure I will be making many more in the future!  

Wish me luck for a smashing party (no pun intended)!... but I can't wait to see what she does with her smash cake :)